SSHFS On Windows: How To Use
Learn to leverage SSH Filesystem (SSHFS) on Microsoft Windows devices with this comprehensive guide. While our previous blog covered SSHFS usage on MacOS, this article shifts the spotlight to Windows. Discover the power of SSHFS for seamlessly mounting remote drives from Windows, Linux machines, and top cloud platforms like Amazon Web Services (AWS), Microsoft Azure, and Google Cloud. With SSHFS, data transmission occurs via the secure SSH protocol, utilizing TCP connection over port 22 to ensure dependable and efficient data transfer. Elevate your cross-device and cross-cloud file management with SSHFS.
Introduction
SSHFS uses the SSH protocol to mount a filesystem over SSH. This method is a quick and easy to get a filesystem up and running since most modern computers have SSH enabled by default. In order to use SSHFS on Microsoft Windows we are going to use SSHFS-Win which is an SSHFS port to Windows which uses Cygwin for the POSIX environment and WinFsp for FUSE functionality.
Installation
In order to use SSHFS on Windows we need to install the following packages:
We can use the Windows Package Manager (winget) to easily install both packages from the Windows Terminal.
If you are unsure if you have the Windows Package Manager installed I have a blog post that goes over the verification, installation, and usage of winget. Before we install these packages let’s learn more about them using the winget show command after which we can use winget install.
WinFsp
WinFsp is a tool that allows developers and software engineers to to write their own file systems (Windows drives) as user mode programs and without Windows kernel programming knowledge. WinFsp is similar to FUSE (Filesystem in Userspace) for Linux and other UNIX-like systems.
winget show -e --id "WinFsp.WinFsp"
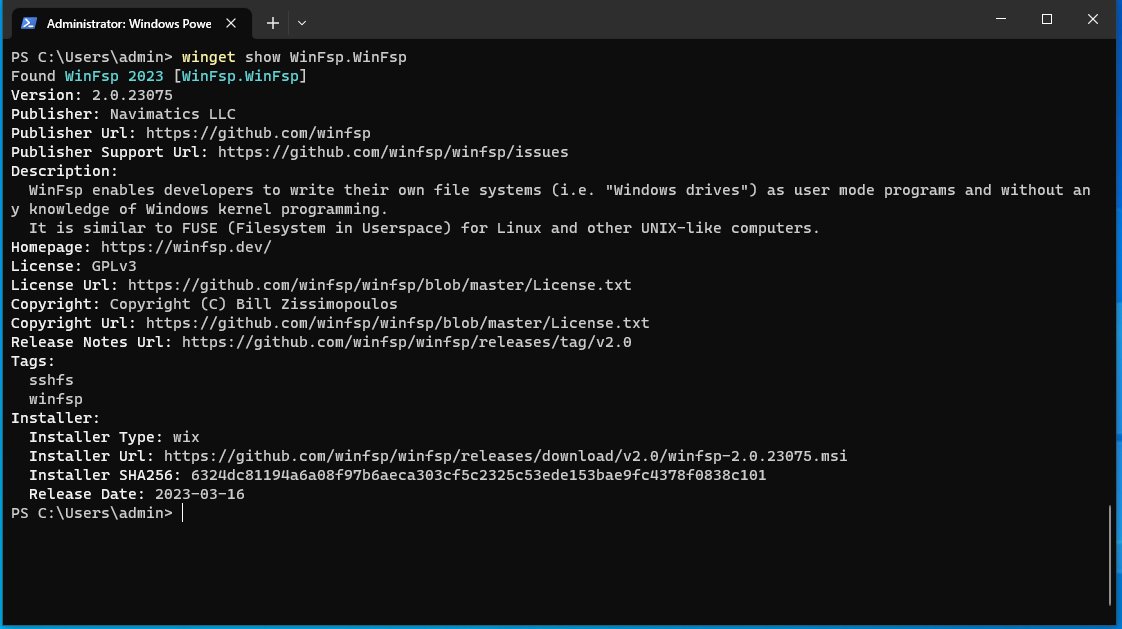
winget show WinFsp.WinFsp output
We can install the WinFsp.WinFsp package using the winget install command.
winget install -e --id "WinFsp.WinFsp"

winget install WinFsp.WinFsp output
Once WinFsp is installed we can proceed to installing SSHFS-Win.
SSHFS-Win
SSHFS-Win is a port of SSHFS to Windows as we learned in the introduction SSHFS-Win uses Cygwin and WinFsp. Let’s inspect the sshfs-win package using the winget show command.

winget show SSHFS-Win.SSHFS-Win output
We can install the SSHFS-Win.SSHFS-Win package using the winget install command.
winget install -e --id "SSHFS-Win.SSHFS-Win"

winget install SSHFS-Win.SSHFS-Win output
Once we’ve installed the WinFsp and SSHFS-Win packages we can proceed to use SSHFS to mount an external drive over SSH.
Mount an SSHFS Drive on Windows
Mounting an SSHFS drive on Windows is as simple as mapping a drive using Windows Explorer or a PowerShell terminal.
Adding an SSHFS Drive with Windows Explorer
In order to mount an SSHFS drive through Windows Explorer open Windows Explorer and right click This PC > Map network drive

Select This PC > Map network drive in Windows Explorer
After this a Windows dialog will appear, in this window we need to specify the Drive to mount to as well as the external SSHFS Folder. In order to do so we need the username, host, and remote directory to mount.

Specify the Drive & remote SSHFS Folder to mount
We may be asked to provide a password when connecting to the remote machine.

Windows Security password prompt when connecting
Once successfully mounted we’ll be able to see the newly mounted drive in Windows Explorer.

Mounted SSHFS drive in Windows Explorer
We have just successfully demonstrated mounting an SSHFS Drive using Windows Explorer, this drive is mounted over an SSH connection, awesome!
Adding an SSHFS Drive with PowerShell
In addition to mounting an SSHFS drive with Windows Explorer we can use do so through a PowerShell terminal with the net use command.
net use X: \\sshfs\gothburz@172.16.186.163/sshfs
Be sure to change the username@host/path string to correspond with your own environment.
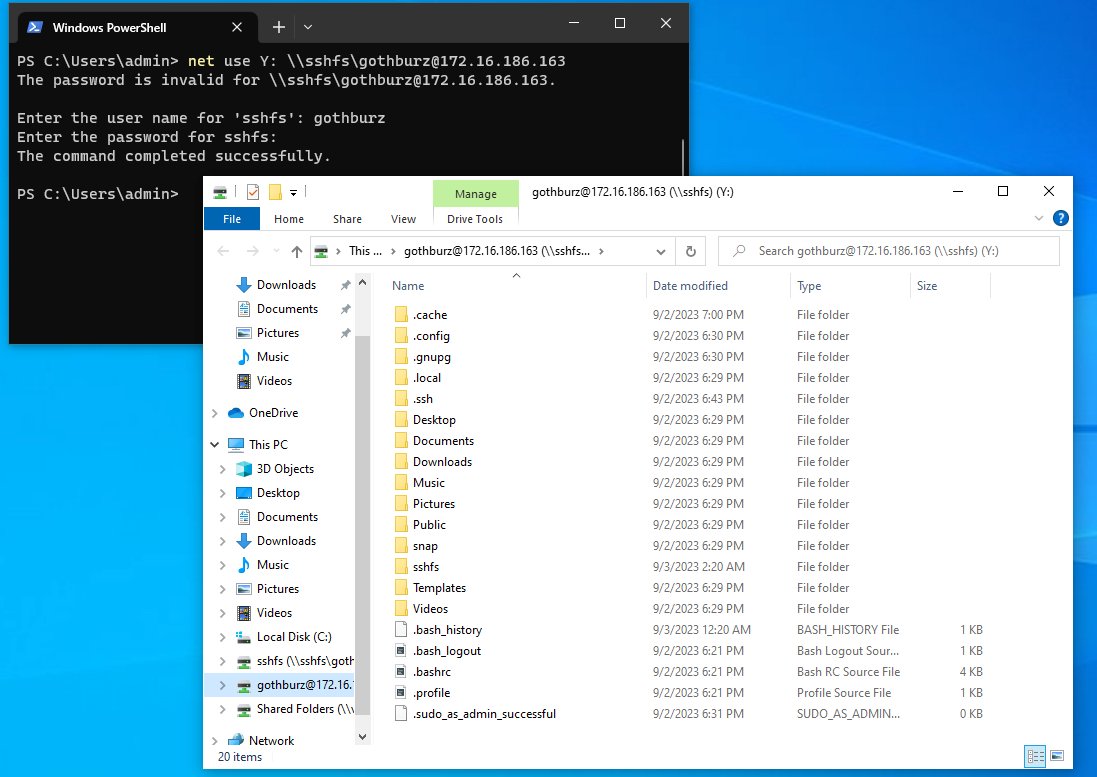
Mounting an SSHFS drive using the net use command

Confirming SSHFS drive mount with the ls command
When using the net use command to mount an SSHFS drive, you may be asked to enter a password to authenticate to the remote host. Once successfully mounted you’ll see a new Windows Explorer pop up with your newly mounted drive, fantastic!
If you you’d like to unmount the drive with net use you can use the following command along with the drive letter.
net use /del Y:

Using net use to delete a drive
Conclusion
In conclusion, this comprehensive guide highlights the usage of the SSH Filesystem (SSHFS) on Microsoft Windows devices. While our previous blog delved into SSHFS usage on MacOS, this article has provided a detailed exploration of leveraging SSHFS on Windows systems. By harnessing the capabilities of SSHFS, users can experience the seamless and convenient mounting of remote drives from a variety of sources, including Windows, Linux machines, and leading cloud platforms such as Amazon Web Services (AWS), Microsoft Azure, and Google Cloud.
I hope you found this article insightful, if you need any help using SSHFS on Windows feel free to message me on social media and see you in the next post. :)